Welcome

Welcome to Kay's Village Recipes! Some believe the heart of the home is in the kitchen, I believe the kitchen is the heart of the village. It takes a “village” to live life to its fullest and it has nothing to do with geography or how large or small a town you live in. My “village” is inhabited by family members, dear friends, co-workers, and the occasional visitor who is in my life for a short period of time. Each one of these people has a profound impact on my emotional wellbeing as well as the quality of my life, and all have one thing in common…they all love to eat, and I love to cook for them.
On this blog you will find free, family recipes for: homemade soups, breads, apple pie, cakes, candies, snacks, casseroles, main courses, side dishes, appetizers, breakfast, home-style cooking, and so much more.

Tuesday, December 20, 2011

Reindeer Chow

Original Recipe from:  Pamela-Tomblin-Schultheis

A few years ago Pam made what she called Puppy Chow for a Christmas treat.  I immediately decided this needs to be a family tradition, but I really didn’t like the name.  Having had a few dogs in my life the idea of eating “puppy chow” was not appealing to me…so I changed the name to Reindeer Chow.  The recipe is just a tad messy, but the results are well worth it!  You will need a LOT of space unless you work in half-half batches, which can easily be done.  Since working in two batches means two kitchen cleanings, I prefer to make the entire batch.  Although if you don’t have a lot of folks to share this with; a half-batch may be just the perfect size for you.

Using treat bags Reindeer Chow makes a great gift item.  Co-workers, friends and family are always delighted when their gift includes a bag of this tasty treat.  White chocolate, salty pretzels and crunchy cereal blend together to make the perfect snack.  I promise this is a recipe to try.  Enjoy!


Ingredients
2-12.6 oz. bags Peanut M&M’s (holiday colors)
14 oz. box Cheerio’s
12.8 oz. box Rice Chex
1-2 (7.5 oz.) bags Bugels
1 lb. bag Mini Pretzel sticks
4 lbs. White Chocolate


Directions
Cover table or countertop with wax paper, overlapping the strips.  Note:  I have found that taping the strips together on the bottom side helps to keep the wax paper from shifting as you spread out the mix.

Mix dry ingredients together in a very large mixing bowl or baking pan.  Note:  Some people prefer to lay the mixture out on the table and pour the chocolate over the mixture on the table.  I prefer to use a mixing bowl.


At this point I actually work in quarter batches to coat the mixture with the chocolate.  I have found that it is easier for me to work the mixture and more evenly coat it with the chocolate.  I tried the mix it all on the table method and didn’t like the process at all.  I encourage you to work it in the way that works best for you. 

Melt Chocolate in a double boiler or microwave one pound at a time.  Pour Chocolate over mixture and mix to coat evenly.


Allow mixture to dry.  Break into pieces and package.  I use treat bags, but you could use tins or jars. 

Friday, December 16, 2011

Scotch Shortbread

Original Recipe from:  Virginia Bowers-Johnson

Unless you are fortunate enough to live near a Scottish bakery to get authentic shortbread you need to make it yourself.  Store-bought, mass-produced shortbread never tastes “just right”.  This is an old family recipe I found in my mother’s collection.  Have a pot of tea ready to serve with this delicacy.  Enjoy!

 
Ingredients
1 pound Butter
4 cups Flour
1 cup Sugar


Directions

Blend well.  Add Flour gradually.  Mix with hands until like pastry and press into a large cookie sheet to 1/2 inch thickness.  Prick with a fork all over.  The original recipe reads; “prick, prick, prick”.  I take that to mean…do a thorough job pricking the dough before baking. 


Bake in 275 degree oven for 1 hour.  Should be very light brown in color when done.  Cut while warm but leave in the pan until cool.  


Wednesday, December 14, 2011

Grandma’s Press Cookies

Original Recipe from:  Lucy Griffin-Bowers

My sister, Margaret, and I liked to make Press Cookies for Christmas.  We would have so much fun making them together.  I mixed and baked, Margaret decorated.  Knowing that we were using the same recipe our grandma always baked made the whole experience that much more special.  Recipes from earlier generations provide comfort and continuity to our lives.  The memories of preparing and eating the food are as important as the taste and nutrition.  I cherish this recipe for that very reason.  Enjoy!

Ingredients

1 cup Butter or Margarine (2 sticks), softened
1 cup Sugar
2 Eggs
1-1/2 teaspoon Vanilla
3 cups sifted Flour
1/4 teaspoon Salt

Directions

Pre-heat oven to 400 degrees.

Cream together the Butter, Sugar, and Vanilla.  Add Eggs and beat well.  Add Flour and Salt and mix until blended. 

Fill Cookie Press with batter.  Press onto ungreased cookie sheet.  Bake 10-12 minutes.  Sprinkle with colored sugar after removing from the oven.  Cool on wire racks. 

Monday, December 12, 2011

Toll House Chocolate Chip Cookies

Original Recipe from:  Nestle®

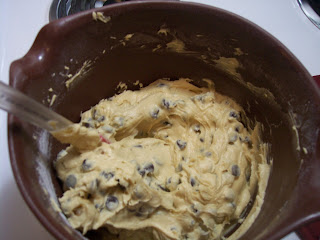
The Original Toll House Chocolate Cookie is, to me, the best chocolate cookie ever.  This is the recipe that I have used since I learned to bake cookies.  In fact, I believe this is the very first cookie I ever baked.  Our dear, family friend, Carol, taught me to bake them at the shortest recommended baking time for soft, chewy cookies.  The holidays are not complete if I don’t make at least one batch of these delicious cookies.  They are Santa’s favorite after all.  Make a batch today and get that wonderful aroma throughout your home.  Oh, and get a glass of cold milk ready.  Enjoy!


Ingredients

1 cup Butter (2 sticks), softened
3/4 cup firmly packed Brown Sugar
3/4 cup Sugar
2 Eggs
1 teaspoon Vanilla
2-1/4 cups Flour
1 teaspoon Baking Soda
1 teaspoon Salt
2 cups (12 ounce package) Nestle Toll House Semi-Sweet Chocolate Morsels
1 cup chopped Nuts (optional)

Directions
Pre-heat oven to 375 degrees.

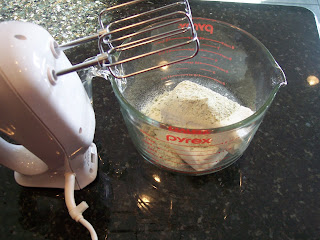
In a medium mixing bowl, combine Flour, Baking Soda, and Salt.  Mix well and set aside.

Beat together Butter, Brown Sugar, Sugar, and Vanilla in a large mixing bowl until creamy.


Add Eggs and beat well.


Gradually beat in Flour Mixture. 


Stir in Morsels and Nuts.  Mix well.


Drop by rounded tablespoons onto ungreased cookie sheet.

Bake 9-11 minutes or until golden brown.  Cool on baking sheets for 2 minutes; remove to continue cooling on wire racks.  Makes about 5 dozen cookies. 

Wednesday, December 7, 2011

Grandma Griffin’s Peanut Butter Cookies

Original Recipe from:  Great Grandma Griffin

Maggie Etta Murray-Griffin was my maternal great-grandmother.  While I personally have very few memories of her, I do remember the many stories my mother and grandmother told me about her.  She was another one of those good cooks in our family who knew her way around the kitchen and how to make delicious foods for her family.  This is a traditional peanut butter cookie recipe, very easy to make and taste great!  Make a batch for your family, get that great smell throughout the house and stand back.  Your taste testers won’t be far behind.  Enjoy!


Ingredients

1/2 cup Butter or Margarine
1/2 cup Peanut Butter (smooth)
1/2 cup Brown Sugar
1/2 cup granulated Sugar
1 Egg
1-1/4 cup Flour
1/2 teaspoon Salt
3/4 teaspoon Baking Soda
1/2 teaspoon Baking Powder


Directions

Cream Butter and Peanut Butter.  Add Sugar gradually and cream thoroughly.


Add well-beaten Egg to the creamed mixture.


Add Flour sifted with Salt, Soda, and Baking Powder.  Mix thoroughly.


Chill the dough in the refrigerator for at least 30 minutes.  Then form into balls the size of a walnut.  Place balls on a floured baking sheet.  Flatten with a fork dipped in flour, making a criss-cross pattern.  Note:  I roll the dough balls in granulated sugar and place on a greased cookie sheet; then flatten with a fork (no need to flour the fork). 


Bake in 350 degree oven for 8-10 minutes.  Cook cookies on a wire rack.  

Monday, December 5, 2011

Tortilla Ranch Roll-Ups

Original Recipe from:  Annie Tynan-Davis

This recipe was sent to me by my dear friend, and blog-follower, Annie.  I recently made them for a girl’s night out party and they were a big hit.  Because we had a couple vegetarians at the party, I made some without any lunch meat, and they were very tasty too.  Roll-ups are great for a party, pot-luck event, or big-game weekends.  An easy to make and fun to eat recipe, sure to please all.  I recommend making them a several hours ahead of time and then slice just before serving.  Make a batch for your friends and family, I know they will love them.  Enjoy!


Ingredients

2-8 ounce packages Cream Cheese, softened
1 package dry Ranch Dressing mix
1/2 cup Red Bell Pepper, minced
1/2 cup Celery, minced
1/4 cup Green Onion, sliced
1/4 cup Olives, sliced (optional)
Deli Ham, Turkey, or Roast Beef, sliced thin
4-10” flour Tortillas


Directions

In a mixing bowl, beat softened Cream Cheese and Ranch Dressing mix until smooth.


Add Red Pepper, Celery, Onions, and Olives, mix well.

Spread about 3/4 cup on each tortilla.  Note:  I used less, about 1/2 cup. 

Layer sliced luncheon meat on top of Cream Cheese Spread.


Roll up tightly and wrap in plastic wrap.


Refrigerate for at least 2 hours.

Slice into 1” pieces.