Welcome

Welcome to Kay's Village Recipes! Some believe the heart of the home is in the kitchen, I believe the kitchen is the heart of the village. It takes a “village” to live life to its fullest and it has nothing to do with geography or how large or small a town you live in. My “village” is inhabited by family members, dear friends, co-workers, and the occasional visitor who is in my life for a short period of time. Each one of these people has a profound impact on my emotional wellbeing as well as the quality of my life, and all have one thing in common…they all love to eat, and I love to cook for them.
On this blog you will find free, family recipes for: homemade soups, breads, apple pie, cakes, candies, snacks, casseroles, main courses, side dishes, appetizers, breakfast, home-style cooking, and so much more.

Wednesday, September 28, 2011

Virginia’s Chicken Noodle Soup

Original recipe from:  Virginia Bowers-Johnson

Chicken Noodle Soup is another family favorite.  It is also another one of those recipes that Mother taught you to make, she never wrote it down.  Each batch always tasted just a little different depending on what Mother put in the soup.  Sometimes she made it with just chicken and noodles.  Other times she would add celery and carrots.  One thing was consistent, it was always good.  My children grew up with Mother's soups and loved them all, just as I did as a child.  My daughter, Pam would just give Grandma a call and put in her request.  Now those requests come to me.  It is an honor to receive those calls.  My mother passed the cooking torch down to me, and I am passing it down to my daughter (and son) through this blog.  What recipes will you pass down to your family?  Make cooking a family event so the “family recipes” are never forgotten.  Enjoy!

Note:  Not all of the measurements are exact in this recipe.  Feel free to increase/decrease as desired to your taste and the amount of soup you want to make.  Leftovers freeze very well.


Ingredients

3 cups Chicken, boiled and cut up
32 ounces Chicken Broth (I use Swanson’s 99% Fat Free, No MSG)
1 tablespoons GFS Roasted Chicken Base
1 cup Celery, diced
1 cup Carrots (shredded or diced)
1 small Onion, cut in quarters
3 stalks Celery
9-12 ounces Medium Egg Noodles (substitute your favorite noodles to taste) 


Directions

Boil chicken in large pot with plenty of water, the onion and celery stalks.  Boil until done, at least 1 hour.  The longer you cook the chicken, the tastier your broth will be.  Set chicken aside to cool.  Strain broth in a colander removing onion and celery.  Note:  I usually do this step the day before and refrigerate the chicken and broth (separately) overnight.  Refrigerating makes easy work of skinning and working with the chicken.  If making the full recipe in one day, let chicken cool thoroughly before proceeding.  Pour chicken broth into a container and refrigerate.  Skimming the fat off the refrigerated broth, before using, makes a healthier option for an old-fashioned recipe. 


Remove skin from the cooked chicken.
Take chicken off the bones.  I wear gloves and remove the chicken by hand.  Mom taught me to tear the chicken into chunks rather than dicing it.  She was a very “hands-on” kind of cook.  I believe it was her way of cooking from the soul.  If you prefer more uniform pieces of chicken, I would recommend you dice the chicken into a medium size chunk. 

Pour Broth from cooking the chicken in a large stock pot.  Pour in the additional store-bought Chicken Broth to the broth you made.  Add diced Celery and Carrots to the broth and bring to a boil.  Add Chicken Base to taste (I use about 1 teaspoon) to give your soup a little more chicken flavor.  Cook at a low boil for about 10 minutes.   


Add Noodles to the broth, bring to a medium-low boil and cook about 10 minutes.

Add Chicken chunks into the soup and simmer for 15-20 minutes.   

Ready to Serve – Enjoy!


Tuesday, September 27, 2011

Village Flatbread Pizza

Original Recipe from:  Kay Johnson-Tomblin

Pizza is one of my personal favorite treats.  My neighborhood is full of delicious take-out pizza choices, but I don’t always feel like ordering out.  Kim’s Pizza Dough is fabulous, but makes way too much for a single household.  I don’t care for most of the ready-made pizza crust options at the grocery story, even though they are available in smaller sizes.  Making a personal pizza at home was a problem for me.  Then I found square Pita Bread at my local grocery store.  The package says “Great as a Pizza Crust”, so I decided to give it a try.  All I can say is, “amazing”!  The perfect crust, the perfect size, very convenient, and taste great!

These pizzas would make a great family night dinner.  Get out a selection of toppings and let each family member make their own pizza.  They would also make a great dinner party theme with each guest making their pizza just the way they like it.  Enjoy!


Ingredients

1 piece Square Pita Bread
Marinara Sauce (or any pizza sauce you like)
Chicken Chunks
Sliced Mushrooms
Bacon Bits
Mozzarella Cheese, shredded


Directions

Monday, September 26, 2011

Grandma’s Pickled Beets for Canning

Original Recipe from:  Lucy Griffin-Bowers

One of my mother’s favorite vegetables was beets, cooked, pickled, as a side dish, or in a salad.  You name a way to prepare beets and my mother loved them just that way.  Unfortunately, I never developed the same passion for beets.  Left to my own tastes, I probably wouldn’t have included any beet recipes on this blog.  Fortunately, I am not the only one who decides which recipes get posted.  You, the readers of this blog, have a voice in what I post.  Blog follower, Michelle, requested this recipe and several more chimed in when she made the request.  So, Beet Lovers, here you are.  This recipe was in Grandma’s 1930’s recipe collection.  Enjoy!


Ingredients and Directions (in Grandma’s words)

10 pounds Beets
2 cups Sugar
3 cups (24 ounces) White Vinegar
1 tablespoon Salt. 
1 teaspoon Black Pepper

Wash and peel Beets.  If Beets are large, cut into quarters.

Add all ingredients, except the beets, into a large stock pot and bring it to a boil.  Add beets and continue cook at a low boil for 20 minutes.  Fill jars with Beets while hot.  Pour hot brine over the beets in the jars leaving 1/2 inch head room.  Put lids on jars and process.

Kay’s Notes:  Process jars as recommended by your canner’s instruction manual or the USDA Complete Guide to Home Canning website.   

Wednesday, September 21, 2011

Grandma’s Canned Corn

Original Recipe from:  Lucy Griffin-Bowers

There is nothing my family loves better than farm fresh corn on the cob.  Michigan grows the best bi-color, sweet corn.  Imagine tasting that same delicious corn in the middle of winter….yum!  Canning corn is very simple, and pretty fast.  The most labor intensive part is cutting the corn off the cob.  The time consuming part is just the processing time for the filled jars.  A pressure canner is best for corn, much faster than the hours you have to boil using the hot water bath method.  Grandma’s recipe uses quart size jars.  Unless you have a large family, you might find pints are better for you.  If you are single, half-pint jars would work great.  That’s the beauty of canning; you make the size that works best for your household. 

Grandma had two recipes for canned corn, each is listed below.  Take your pick, they are both great.  My personal favorite is the first one, Canned Corn.  Enjoy!

Canned Corn

Ingredients and Directions (in Grandma’s words)

Cut corn from cobs raw and pack in quart jar half full and put 1 teaspoon salt on this.  Then finish filling jar full, loosely.  Don’t put any water in the corn after you fill jars.  Put on lids and process for 3 hours (hot water bath method)  See Kay's Note below.


Canned Cooked Corn

Tuesday, September 20, 2011

Grandma’s Grape Butter

Original Recipe from:  Lucy Griffin-Bowers

This recipe comes from my grandma’s 1930’s collection.  She used to tell me stories about picking grapes off the vines and then making juice, jelly, jam and butter from them.   As a city kid, I found that amazing.  Didn’t she just buy that stuff from the grocery store?  I couldn’t imagine a life in which you had to grow and raise your own food.  If you like grape jam and jelly, I am sure you will like Grape Butter.  The recipe doesn’t specify which kind of grape to use, but I remember grandma saying she used red grapes (I don’t remember if she ever used a particular name of the grapes).  This recipe sounds absolutely delicious and very different than anything I’ve ever bought in any store.  I invite you to give it a try (I know I will).  Enjoy!

Note:  I do not have pictures for this recipe as I have not made this recipe yet.  If you need pictures of the fruit butter making process, please see my Village Peach Butter recipe.  I will post pictures of this recipe as soon as they are available. 

Ingredients

7 pounds Grapes
7 pounds Sugar
1 pound Raisins
1 pound English Walnuts
Half-pint canning jars and lids


Directions

Pop the insides out of the grapes, and cook, then run through sieve.  Take this, sugar and raisins, and cook for a while.  Then put the “outsides” in the mixture and last…put nuts in and cook until thick.  Seal and process in jars.

Kay’s Notes:  Butter is done when it sticks to the spoon.  Process jars as recommended by your canner’s instruction manual or the USDA Complete Guide to Home Canning website

Important Note:  It is very important to start with a clean kitchen and to keep it clean during the cooking and canning process.  Sanitize your sink, counters and stovetop with a bleach water solution before preparing the recipe.  Clean up after each stage to maintain a clean environment.  Glass canning jars should be washed and sterilized in boiling water or run through the dishwasher using the heated drying cycle before filling with the fruit butter.  Jar lids and rings should be boiled for 5 minutes before using.  Rings can be reused multiple times, just inspect them for dents or rust (throw those away).  Jar lids can only be used once and then should be disposed.

Monday, September 19, 2011

Grandma’s Canned Apples

Original Recipe from:  Lucy Griffin-Bowers

My grandma canned everything that could be canned and then used those jars throughout the year to feed her family.  Southeastern Michigan has some of the best orchards in the region and I am fortunate enough to live around those orchards.  To be honest, I have never canned apples.  Oh, I’ve made applesauce, apple butter, pies, cobblers, and such; but I have never made canned apples.  When I found this recipe and saw how simple it is, I decided this is the year I will give it a try.  It is my hope that this recipe will inspire you to try a something new in your kitchen.  Make a goal to add something to your list of cooking skills.  Have fun with it, encourage your family to get into it with you.  Make it a family project.  Your life will be richer for it, I promise.  Enjoy!

Ingredients and Directions (in Grandma’s words)

Peel and slice apples.  Put jar under running water and fill it with apples while the water runs into the jar.  When filled put and aspirin on top of the apples.  Seal and process jars.

Kay’s Notes:  Slice the apples as thin/thick as you like for use in cobblers, pies, and such.  The aspirin will prevent the apples from turning brown in the preserving process.  Process jars as recommended by your canner’s instruction manual or the USDA Complete Guide to Home Canning website.   

Sunday, September 18, 2011

Village Apple Butter

Original Recipe from:  Kay Johnson-Tomblin

Apple Butter is my absolute favorite fruit butter.  Growing up I remember my mother asking my grandmother to make some apple butter for her.  My grandmother, who’s canning days were far behind her, told her to make it herself.  My mother, who never canned anything, never made apple butter.  As a result I never learned how from any family member.  I figured apple butter must be pretty hard to make if Grandma and Mother wouldn’t make it.  As an adult I had learned to can vegetables and make jams, but I stayed away from fruit butters, because I thought they were too hard.  Then a few years ago, I decided I was up to the challenge.  I had, what seemed to me, a pretty easy recipe.  I also had some advice…it’s not hard; it just takes a long time.  So, with that in mind, I decided to give it a try.  After all it is my favorite.  Well, I’m proud to say that my first attempt was a stellar success!  Like all of my canning treats, I give jars away for gift-giving occasions.  My village of dear friends and family now look forward to my annual Apple Butter, and let me know when they are running low (or completely out) on their supply.

Apple Butter tastes different depending on what type of apples you use.  My favorite apple is McIntosh.  McIntosh apples are not available in all parts of the country, but are plentiful in Michigan.  You just want to use an apple that holds its flavor when cooked.  If you are purchasing your apples from an orchard, don’t be afraid to ask which apples will work best.  Some cooks like to mix two or three types of apples for their butters.  Have fun and experiment.  Cooking times always vary depending on the water content of the fruit and how it reduces as it cooks. 

Making Apple Butter is not hard, there are only a few ingredients, but it does take a lot of time.  I encourage you to give it a try, at least once in your life.  There is something so satisfying about opening a jar of fruit butter and serving it to your friends and family knowing that you made it yourself!  Serve it with steaming hot biscuits, over French toast or waffles, as a breakfast or dinner treat.  It’s also great with afternoon teatime.  This is my recipe.  My Grandma’s recipe is very similar, but she didn’t add cinnamon to hers.  Feel free to make it either way.  Enjoy!

Note:  I do not have pictures for this recipe as I have not made this year’s batch yet.  If you need pictures, please see my Village Peach Butter recipe.  Apple Butter cooks and cans like Peach Butter.  I will post pictures with this recipe soon. 

Ingredients

1/2 bushel ripe Apples.  I use McIntosh Apples, but any good cooking apple will work.  Note:  you can do a bushel at a time, but I prefer to work in smaller batches)
Sugar
Cinnamon
Vinegar
Half-pint canning jars and lids

Directions

Friday, September 16, 2011

Village Canned Tomatoes

Original Recipe from:  Kay Johnson-Tomblin

I was raised in the city and have lived my adult life in the suburbs on the edge of country.  Being able to buy fruits and vegetables right at the farm stand has given me an appreciation for freshness.  Growing up listening to my grandmother’s stories about growing her gardens and then “putting it all away” to eat throughout the year, gave me an interest in canning and preserving.  When I was 18 years old I decided to give canning tomatoes a try.  I thought to myself, “How hard could it be?”  Well, I found out three things.  First, it’s not hard at all.  Second, nothing beats fresh canned tomatoes.  Third, I love canning.

If you are a novice to canning, tomatoes is a great place to start.  You can do the entire process all by yourself, or have a great time working with another person or more on the project.  Canning can be a real family affair and fun for all.  You’ll enjoy every jar and remember how much fun you had canning last summer.  Create Memories….Create Goodness!  Enjoy

See my Canning Tomatoes Story


Ingredients

1/2 bushel ripe Tomatoes.  Firm, plump, fully ripe, and un-bruised.
Salt
Pint glass canning jars
Jar rings and lids
Canner (Water Bath or Pressure Canner)


Directions

Tuesday, September 13, 2011

Village Peach Butter

Original Recipe from:  Lucy Griffin-Bowers and Kay Johnson-Tomblin

This recipe was in with my grandma’s canning recipes from the 1930’s.  I have made apple butter many times but have never tried making any other fruit butter.  When I saw this recipe, I just had to give it a try.  Peaches are one of my favorite fruits so it just stood to reason that Peach Butter would be delicious.  Fruit Butters are a cousin to jams.  A little less sweet, smoother in texture and great not only on toast or biscuits, but also go well with cheese or meats.  Be prepared for the process to take hours (lots of them), but I promise the end result will be worth the time.  Fruit butters can be refrigerated or frozen, however, are best when canned in jars.  My first batch yielded 20 half-pint (8 ounces) jars and was so good I decided to make a second batch.  My second batch yielded 28 jars.  The second half bushel of peaches was much better and a little firmer than the first.  Your yields (and cooking times) will always vary depending on the water content of the fruit and how it reduces as it cooks. 

Making Peach Butter is not hard, there are only two ingredients, but it does take a lot of time.  I encourage you to give it a try, at least once in your life.  There is something so satisfying about opening a jar of fruit butter and serving it to your friends and family knowing that you made it yourself!  Serve it with steaming hot biscuits, over French toast or waffles, as a breakfast or dinner treat.  It’s also great with afternoon teatime. 

This is Grandma’s recipe; I just tweaked it by using more modern kitchen appliances.  Enjoy!


Ingredients

1/2 bushel ripe Peaches.  (Note:  I purchase “seconds” from the orchard, not as pretty as “firsts” but less expensive and taste just as good)
5-6 cups Sugar (more or less depending on how sweet you like your butter)
Half-pint canning jars and lids

Saturday, September 10, 2011

Bread and Butter Pickles

Original Recipe from:  Tomblin Family

This recipe is from a small town, deep in the hills of West Virginia.  Southern women know how to cook, can and preserve foods from their gardens.  They pass the recipes down through the generations and everyone gets involved in the canning process.  If you have never canned before, I highly recommend giving it a try.  Canning is not hard, it’s just time consuming.  There is something very satisfying about opening a jar of pickles (or anything else) that you made yourself.  In the middle of winter, it’s a wonderful reminder of summer’s bounty.  Enjoy!

Ingredients

4 quarts Cucumbers, sliced thin
2 medium Onions, sliced thin
3 large Green Peppers, sliced lengthwise
1-1/2 quarts Water
1-1/2 quart White Vinegar
4 cups Sugar (or sweeten to taste)
1 teaspoon Celery Seed
1 teaspoon Pickling Spice
1/2 teaspoon Alum in each jar

Directions

Peel and slice Cucumbers and Onions.  Slice Green Peppers (remove stems and seeds)

Soak Cucumbers, Onions and Peppers with 2 trays of ice for 6 hours.  Cover with a lid.

Boil remaining ingredients 5 minutes.  Pour pickles in mixture and soak until they change colors.  Seal in jars.  Process in a hot water bath or pressure canner.

Thursday, September 8, 2011

Chicken Papracash

Original Recipe from:  The Tomblin Family

As a young bride, I was given this recipe because it was one of the Tomblin Family favorites.  My kids loved it when they were little and it’s still one of their favorites now that they are all grown up.  This is a very easy chicken recipe and goes well with mashed potatoes, a vegetable and a salad.  Leftovers taste great for lunch the next day too.  This is an easy, inexpensive and hearty dish for your family.  Enjoy!

Ingredients

1 Chicken, cut-up
1 can Cream of Mushroom Soup
1 medium Onion, sliced and separated into rings
1-2 tablespoons Paprika (to taste)
Black Pepper, fresh-ground, to taste
1 clove Garlic, minced
Olive Oil

Directions

Wash and dry Chicken pieces.  In a large skillet cover the bottom with Olive Oil and brown Chicken, Garlic and Onion.  Add remaining ingredients and simmer until chicken is done and tender (approximately 45-60 minutes).  

Wednesday, September 7, 2011

Great Aunt Ina’s Shortbread

Original Recipe from:  Kim Ashbrook’s Great Aunt Ina

Here is another recipe from Blog Followers, Kim and John Ashbrook.  Kim and John have a great recipe collection and are nice enough to share with the village.  Every recipe from Kim and John promises to be delicious!  This recipe is from Kim’s Great Aunt Ina from Scotland.  Make a batch of shortbread and a perfect cup of tea and then…..Enjoy!

Ingredients

1/2 pound Butter
2 cups Flour
1/2 cup Confection Sugar

Directions

Blend well.  Add Flour gradually.  Mix with hands until like pastry and press into the pan firmly.  Prick with fork all over.  Bake in 9x9 inch baking pan for 45 minutes to 1 hour in a slow oven at 300 degrees.  Should be very light brown in color when done.  While warm cut in squares or desired shapes. 

Note:  If you like thinner shortbread, use a larger pan and bake for less time.

Tuesday, September 6, 2011

Virginia's Cucumber Dip

Original Recipe from:  Virginia Bowers-Johnson

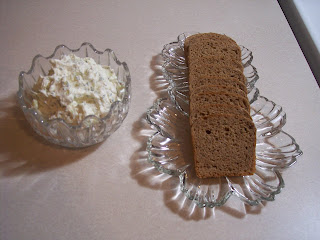
Cucumber Dip is a very easy appetizer to make; it just takes a few minutes, and tastes great!  It’s very easy on the budget, yet big on flavor.  My mother collected appetizer recipes with a passion.  When she entertained she always wanted something different for her guests.  You could count on her to be the “first” to serve a dish and from that point on her friends would be serving it regularly.  Make this dip for your friends and surprise them with the fresh taste of cucumber.  Serve with cocktail breads or crackers.  Enjoy!


Ingredients

8 ounces Cream Cheese (I use Neufchatel)
1/2 cup finely shredded Cucumber (well drained)
1/8 teaspoon Worcestershire Sauce (use 1/4 teaspoon if you prefer a little more flavor)
Cocktail bread and/or Crackers


Directions

Peel and shred a smaller sized Cucumber.  In a colander, drain as much liquid out of the shredded cucumber as you can (cucumbers have a very high water content).  

Mix all ingredients until well blended.  I use a mixer.


Chill for at least an hour before serving.  Serve with Rye or Pumpernickel Cocktail bread or crackers.


Note:  You can make this dip the night before your event and store in the refrigerator. 


Monday, September 5, 2011

Grandma’s Peach Pie

Original Recipe from:  Lucy Griffin-Bowers

Grandma’s 1930’s era recipes are a treasure trove of good country cooking, and this recipe is no exception.  Peach pie can be made using a double crust or a meringue for the topping.  Either way, you will have a delicious pie.  I prefer to use fresh fruits whenever possible, but canned peaches are a good substitute the rest of the year.  When using canned peaches, I prefer to use the unsweetened ones and drain the juice. 

Ingredients

8-10 ripe Peaches
3/4 cup Powdered Sugar
1/2 teaspoon Lemon Juice
1/8 teaspoon Salt
1 Pie Crust (two if using a top crust)


Directions

Cover pie plate with Pie Crust.  To prevent juice soaking in, brush the bottom crust with melted Crisco (1-2 tablespoons) and dust with flour. 

Peel and slice the peaches into the pie plate.  Cover with the powdered sugar; then sprinkle with Lemon Juice and Salt.  Dot with bits of Crisco (I use butter pats).  Cover with top crust.  Note:  brush the top crust with one egg white for a beautiful golden brown color when done. 

Bake in hot oven, 450 degrees, for 15 minutes.  Reduce heat to 350 degrees until pie is done, about 15 minutes more. 


Meringue Directions

Prepare pie as directed above without the top crust.  Bake the pie in 350 degree oven until crust is done (about 30 minutes). 

Beat two Egg Whites with two tablespoons Sugar until stiff.  Spread over top of the pie (form peaks with a fork) and return to the oven.  Bake until meringue is golden brown. 

Sunday, September 4, 2011

Aunt Lillian’s Strawberry Pie

Original Recipe from:  Lillian Bowers-Leasburg

Aunt Lillian is a woman of grace and poise; a gentle woman with southern charm and style.  When you walk into her home you will feel “at home”, the house actually feels like it’s giving you a big hug.  You will sit around her kitchen and have a good helping of Aunt Lillian’s cooking and relaxed conversation.  If you are lucky, she’ll make this pie for you.  Make one the next time you’re having company and let the conversation flow.  Enjoy!

Ingredients and Directions

3/4 cup Sugar
2 tablespoons Corn Starch
1/4 teaspoon Salt
1 cup Water

Combine all ingredients and cook until thick and clear.  Add small package Strawberry Jell-o.  Cool 10 minutes.  Add sliced Strawberries (approximately 1 pint) to mixture.  Pour into baked pie shell.  Let cool in refrigerator until firm. 

Try Aunt Kay’s Pie Crust for this recipe. 

Saturday, September 3, 2011

Virginia’s Sausage Bites

Original Recipe from:  Virginia Bowers-Johnson

As the catering services of Lefkofsky’s Deli grew my mother found they needed a bigger selection of appetizer options.  She reached out to all her friends and family members for appetizer recipes.  Her only request was they the dish had to have been something tried and enjoyed.  This is one of those recipes.  In the margin Mother wrote, “good.”  That was her signal that the recipe was put on her appetizer menu.  This is one of those recipes.  I will admit it was great to be one of her “taste testers”!  Simple, tasty and less than 30 minutes to make.  You can even make them ahead and freeze.  Enjoy!

Ingredients

1 pound Hot Breakfast Sausage (she used Bob Evans)
1 pound regular Breakfast Sausage
2-1/2 cups Bisquick

Directions

Blend together thoroughly.  Make into small/medium balls.  Bake in 350 degree oven for about 20 minutes. 

You can freeze them after cooking.  Just reheat for 15 minutes or until thawed and warmed. 

Friday, September 2, 2011

Village Barbeque Sauce

Original Recipe from:  Kay Johnson-Bowers

This is a recipe I forgot about for years.  I used to make it, stopped because I fell for the convenience of just buying a bottle off the shelf.  My excuse was that I was busy and didn’t have time to make everything from scratch.  What I didn’t realize was the amount of sodium and high fructose sugar is in so many of those convenient choices.  Now, in an effort to be more responsible with my diet, I started to make my own recipes, and those of my family.  The very interesting thing is that I’ve learned it really isn’t that time consuming to make my own, and I’m healthier for it.  If you have your fallen for the convenience of bottled sauce, I challenge you to try making your own.  Try a few different recipes, make some additions of your favorite spices and make one of your own.  Have some fun and be healthier in the process.  Enjoy!

Ingredients

15 ounce Tomato Sauce
2 cups packed, Light Brown Sugar
1/2 cup Red Wine Vinegar
1 tablespoon Sea Salt
1 tablespoon Celery Seed
1 tablespoon Chili Powder
2 teaspoons Garlic Salt
2 teaspoons Oregano leaves
1 teaspoon Red Pepper flakes
1/2 teaspoon ground Cloves

Directions

In a medium sauce pan mix all ingredients thoroughly.  Heat to a low boil; then reduce heat to a simmer.  Simmer until thickened.  

Note:  You can double this recipe and refrigerate extra for your next barbeque.  Now, that’s convenient!

Thursday, September 1, 2011

Velvety Custard Pie

Original Recipe from:  Lucy Griffin-Bowers

Ah, the childhood memories of grandma’s custard pie!  There is something so very special about custard pie, the ultimate comfort food.  The women in my family knew how to take a recipe and make it in such a way that you thought No One would ever be able to make it as well.  Then they would share the recipe with you and sure enough when you made it, it tasted just like theirs.  Evidently the secret is in following the recipe!  Yes, it is that simple.  I have learned over the years that when it comes to baking, you need to follow the recipe.  Do not attempt to alter the recipe until you know how to make it.  After a few times of making a recipe, you can try to make changes and see how it turns out.  Once I learned that little secret, no recipe ever intimidated me again.  If you have never attempted a custard pie, give this one a try.  It is really simple.  Enjoy!

Ingredients

1 Pie Crust, 9 inches (roll out dough to a little less than 1/8 inch)
4 slightly eaten Eggs
1/2 cup Sugar
1 teaspoon Vanilla
2-1/2 cups Milk, scalded
Nutmeg

Directions

Thoroughly mix Eggs, Sugar, Salt, and Vanilla.  Slowly stir in hot milk.  At once, pour into unbaked Pie Crust.  Note:  to avoid spills, fill at the oven.  Top with a dash of Nutmeg

Bake in 475 degree oven for 5 minutes, then reduce heat to 425 degrees and bake 10 minutes longer or until knife inserted halfway between crust and edge comes out clean.  Cool on rack.  Serve chilled.

Note:  Try “Aunt Kay’s Pie Crust” for this recipe (or you can cheat and buy the refrigerated ready-made crust). 

Aunt Kay’s Pie Crust

Original Recipe from:  Kay Bowers-Wheeler

My Aunt Kay was a very special lady.  Not only did we share a name in common, she was totally at home in her kitchen.  She had a wonderful ability to feed her family nutritious meals on a shoestring budget, yet you would never know it by the taste of her cooking.  Aunt Kay believed in getting her kids involved in meal preparation, they learned how to cook at early ages.  The heart of her home was definitely centered in the kitchen and dining room.  She was an amazing role model for me growing up.  I proudly share my name and love for cooking with her!  Give her Pie Crust a try and fill it with your favorite pie filling.  Enjoy!

Ingredients

2 cups sifted Flour
3/4 teaspoon Salt
2/3 cup Shortening (Crisco)
5 tablespoons cold Water (no more)

Directions

Combine all ingredients and mix well.  Roll out to desired thickness. 

Bake in 475 degree oven until brown.

Makes 2 pie crusts